5 Things I Wish I Thought About Before Decorating My Dorm

I think that most incoming college students fall into the trap of designing their dorm room with only one year in mind: the first year. But, there is so much growing and evolving that happens in that first year that many are disappointed with their style choices later on.

College is a time of growing up, so in an anticipation of that, make that dorm room style one that can last even after college!

1. Think about your colors
– Just because your room has been pink for ten years doesn’t mean that your dorm room has to be! Don’t ignore neutrals that you can change up with different accent pieces and colors. It’s much cheaper to buy new accent pillows than it is to purchase a new bedspread.
2. Pick the right lamp
– Don’t get drawn in by the plethora of brightly colored, plastic desk lamps. Opt for a more mature, traditional style lamp.
3. Look for simple bedding or something you think you will still love in 5 years
– You’re going to college! Leave the hot pink, polka dots, and zebra print behind!
4. Consider buying bigger than a twin
– If your bed is going to be pushed up against a wall, buying a larger size comforter will increase the changes that you can use it in a future apartment.
5. Get inspired
– This is a new stage in your life, and decorating in a more mature style may take some getting used to. It’s time to turn to Pinterest, magazines, and style sites for some inspiration.

And most importantly HAVE FUN with it!

Share this with anyone you know that is heading off to their first year of college soon!

Quick Built in Update

I’m not saying that I expect apartment built ins to be particularly stylish, but this particular bathroom built in has been bothering me for weeks now. It’s in the bathroom, directly across from the toilet.

The built in and I have basically been having a stare down, and I think i’ve finally won.

It started out looking like this:

140614_0001


    I wasn’t really sure what I wanted to do with it. Because of the limitations I have since it can’t be painted/ altered drastically, I needed an easy, removable solution.

    Believe it or not, I didn’t even turn to Pinterest for this project! I had some tissue paper left over from a previous project, and I knew exactly what I wanted to do!

HELLO POLK A DOTS!


140614_0002

    I removed the shelving then used painters tape and two sheets of tissue paper to transform the entire built in.

    And here it is:


140614_0004


I would suggest this project for anyone in an apartment or dorm room. I think it’s also great for someone who likes to switch up their decor often. I’m pretty pleased with how it turned out.

IKEA Dresser Hack Part 1

I’m so excited to be sharing this! I’ve wanted to do some furniture updating/ painting for a while now. Finding the time and the right project took some time, but it was worth it.

This is definitely not the right place to go if you are looking for advice, but who knows… maybe you’ll be able to learn from my mistakes . This was my first attempt, and i’ll be updating the blog as i make progress.


I found this simple IKEA dresser for $10 on Facebook. It’s a good size, and I knew I wouldn’t really have to do much sanding and prep. 140529_0000

It sat in my room for several weeks until I would start working on it. I already had a spray paint in a light yellow color that i’d been saving for the right project.

Pinterest became my main source of inspiration. I put together a pretty nice inspiration board. You can check it out below:

After a couple coats on the drawers:

140604_0000

I removed the handles and plan to replace them with new hardware. I want to paint the rest a blue color I think. It’s still a work in progress, but i’m enjoying it.

Hopefully the next post will be a nearly completed project. I’ll also share some of the sites/ blogs that I found helpful while planning for this project.

If you have any advice or have a relevant post that you think I should check out, leave me a comment!


Pillows For the Thrifty Woman


I’ve gone shopping, looking for gorgeous pillows to adorn my coaches and bed with, only to be disappointed by their $25 to nearly $65 price tags.

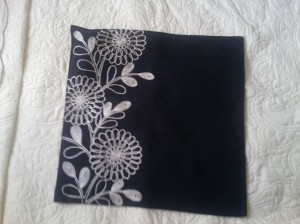
Thankfully, falling in love with a gorgeous place mat and not having any use for it led me to an idea.


130809_0000

         I found this place mate with beautiful embroidery on sale for just $1. The important things to look for are:

  • double-sided
  • quality fabric
  • unique pattern, embroidery, etc.


STEP 1:

130809_0001

      Once you’ve found a good place mat, carefully cut a short hole on one size. Make sure it is big enough to fit the stuffing through.

STEP 2:

130809_0002

      I’ve been able to find relatively inexpensive stuffing at most craft and fabric stores.

STEP 3:

     130809_0003

      I love projects that don’t require me to lug out my sewing machine! Make sure that the pillow is stuffed well and that the stuffing is spread evenly.

THE FINISHED PRODUCT:

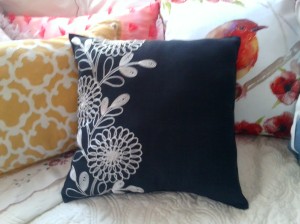
        Congratulations! You now have a beautiful new pillow, and no one will know that you didn’t spend a huge chunk of change on it.

* I also used this same idea to make the yellow pillow on the left. I love how it turned out!

130809_0004

130809_0006


      I hope that you enjoyed this thrifty tip! Share your creations with me in the comments section.